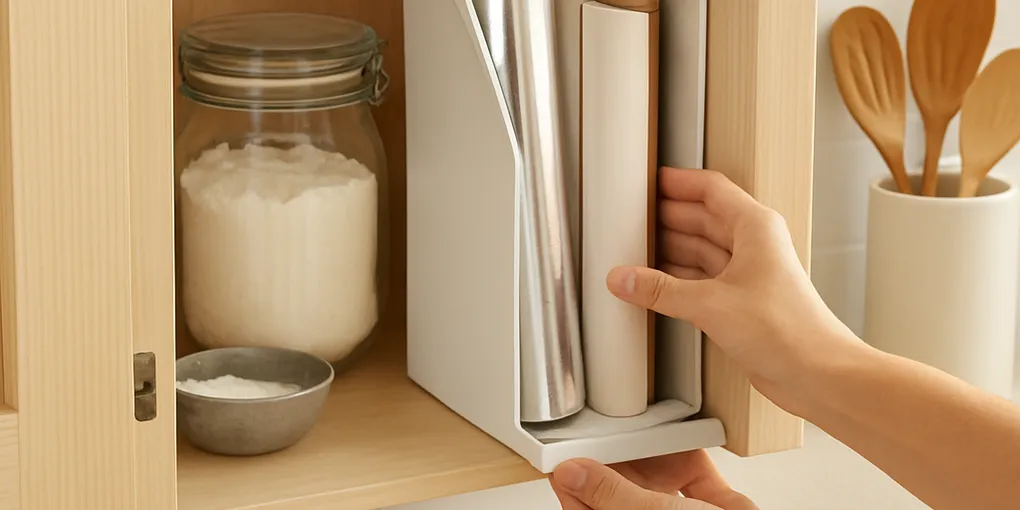
Inside‑Cabinet Wrap Dispenser — Mount a Magazine File to Tame Foil, Plastic Wrap and Parchment
The problem this solves
Countertops and junk drawers get cluttered with half-used rolls of foil, plastic wrap and parchment. Boxes tear, roll ends stick, and grabbing one can pull the whole roll out. Mounting a shallow magazine file inside a cabinet door creates an accessible, tidy dispenser that keeps rolls upright, cuts cleaner and frees drawer or counter space.
What you need
- 1 shallow magazine file or small vertical file holder (plastic or metal; height about 9–12 cm / 3.5–4.5 in)
- 2–4 Command strips (medium/large) or 2 small screws and anchors if you prefer drilling
- Non‑slip shelf liner (optional)
- Small binder clip or clothespin (to hold roll end)
- Ruler or tape measure
- Pencil
Why a magazine file works
- Upright support prevents rolls from rolling around or unraveling.
- Wide mouth fits most standard boxes upright, with the serrated edge still usable.
- Lightweight, inexpensive and easy to mount with no tools if you use Command strips.
Step‑by‑step — mount and set up
1. Choose the cabinet door
Pick an inside cabinet door with enough clearance for the magazine file to open and close without hitting shelves. Avoid doors that house heavy pots or fast-moving items.
2. Measure and mark
- Measure the width of your magazine file and mark a centered spot on the inside of the cabinet door where it will sit vertically.
- Ensure the bottom of the file sits 1–2 cm above any shelf lip so rolls don’t rub when the door closes.
3. Prepare the magazine file
- Cut a 10–15 cm strip of non‑slip shelf liner and place it inside the base of the file to keep boxes from sliding when you pull a roll.
- If your file has a closed back, consider cutting a small notch at the front base (use scissors) to allow the end of a roll to be threaded out and clipped.
4. Mount with Command strips (no tools)
- Attach 2–4 Command strips to the back of the magazine file — top and bottom for stability.
- Press the file firmly against the cabinet door at your marks for 30 seconds per strip.
- Wait the Command strip recommended time (usually 1 hour) before loading heavy items.
Alternative: For permanent mounting, predrill pilot holes in the file and fasten with 2 small screws and anchors into the door.
5. Load your rolls
- Place foil, plastic wrap and parchment upright inside the file, boxes inward so the serrated edges are toward the door opening.
- For rolls that tend to slip out, remove the cardboard cores and nest the rolls together; the shelf liner helps keep them stable.
6. Make tearing clean and easy
- Leave the serrated edge of the original box accessible when you close the door. For a neater tear:
- Thread the free end of the wrap through the notch you cut at the file base.
- Use a small binder clip or clothespin on the outside of the door to clamp the free end so it’s always ready to grab.
- If the factory cutter is dull, attach a small serrated knife or replaceable cutter strip to the inside of the door where the roll exits.
Loading variations and tips
Multiple rolls
- Use two magazine files side by side on the same door or use one file and stagger extra rolls behind it.
- Label the front edge of the file with a removable sticker to know which roll is which.
For bigger rolls (bigger foil, butcher paper)
- Turn the file sideways (door permitting) and lay larger rolls on their side with the roll end threaded through the slot you cut.
Keeping sticky ends accessible
- Attach a small loop of ribbon or a 3 cm strip of painter’s tape to the free end of each roll so you can grab it fast without unravelling.
Maintenance
- Every few months clean the shelf liner and inspect Command strips for wear.
- If you replace boxes, slide new ones in with the serrated cutter facing the file opening for easy access.
Why this hack is life‑changing
It takes a tiny, inexpensive organizer and converts wasted inside‑door real estate into a neat, no-drama dispenser. You get cleaner cuts, less wasted wrap, and a decluttered drawer or counter — all without expensive fixtures or complicated installs.